3D printing file preparation workflow
Redesigning the 3D printing file preparation workflow to minimize print failures
Overview
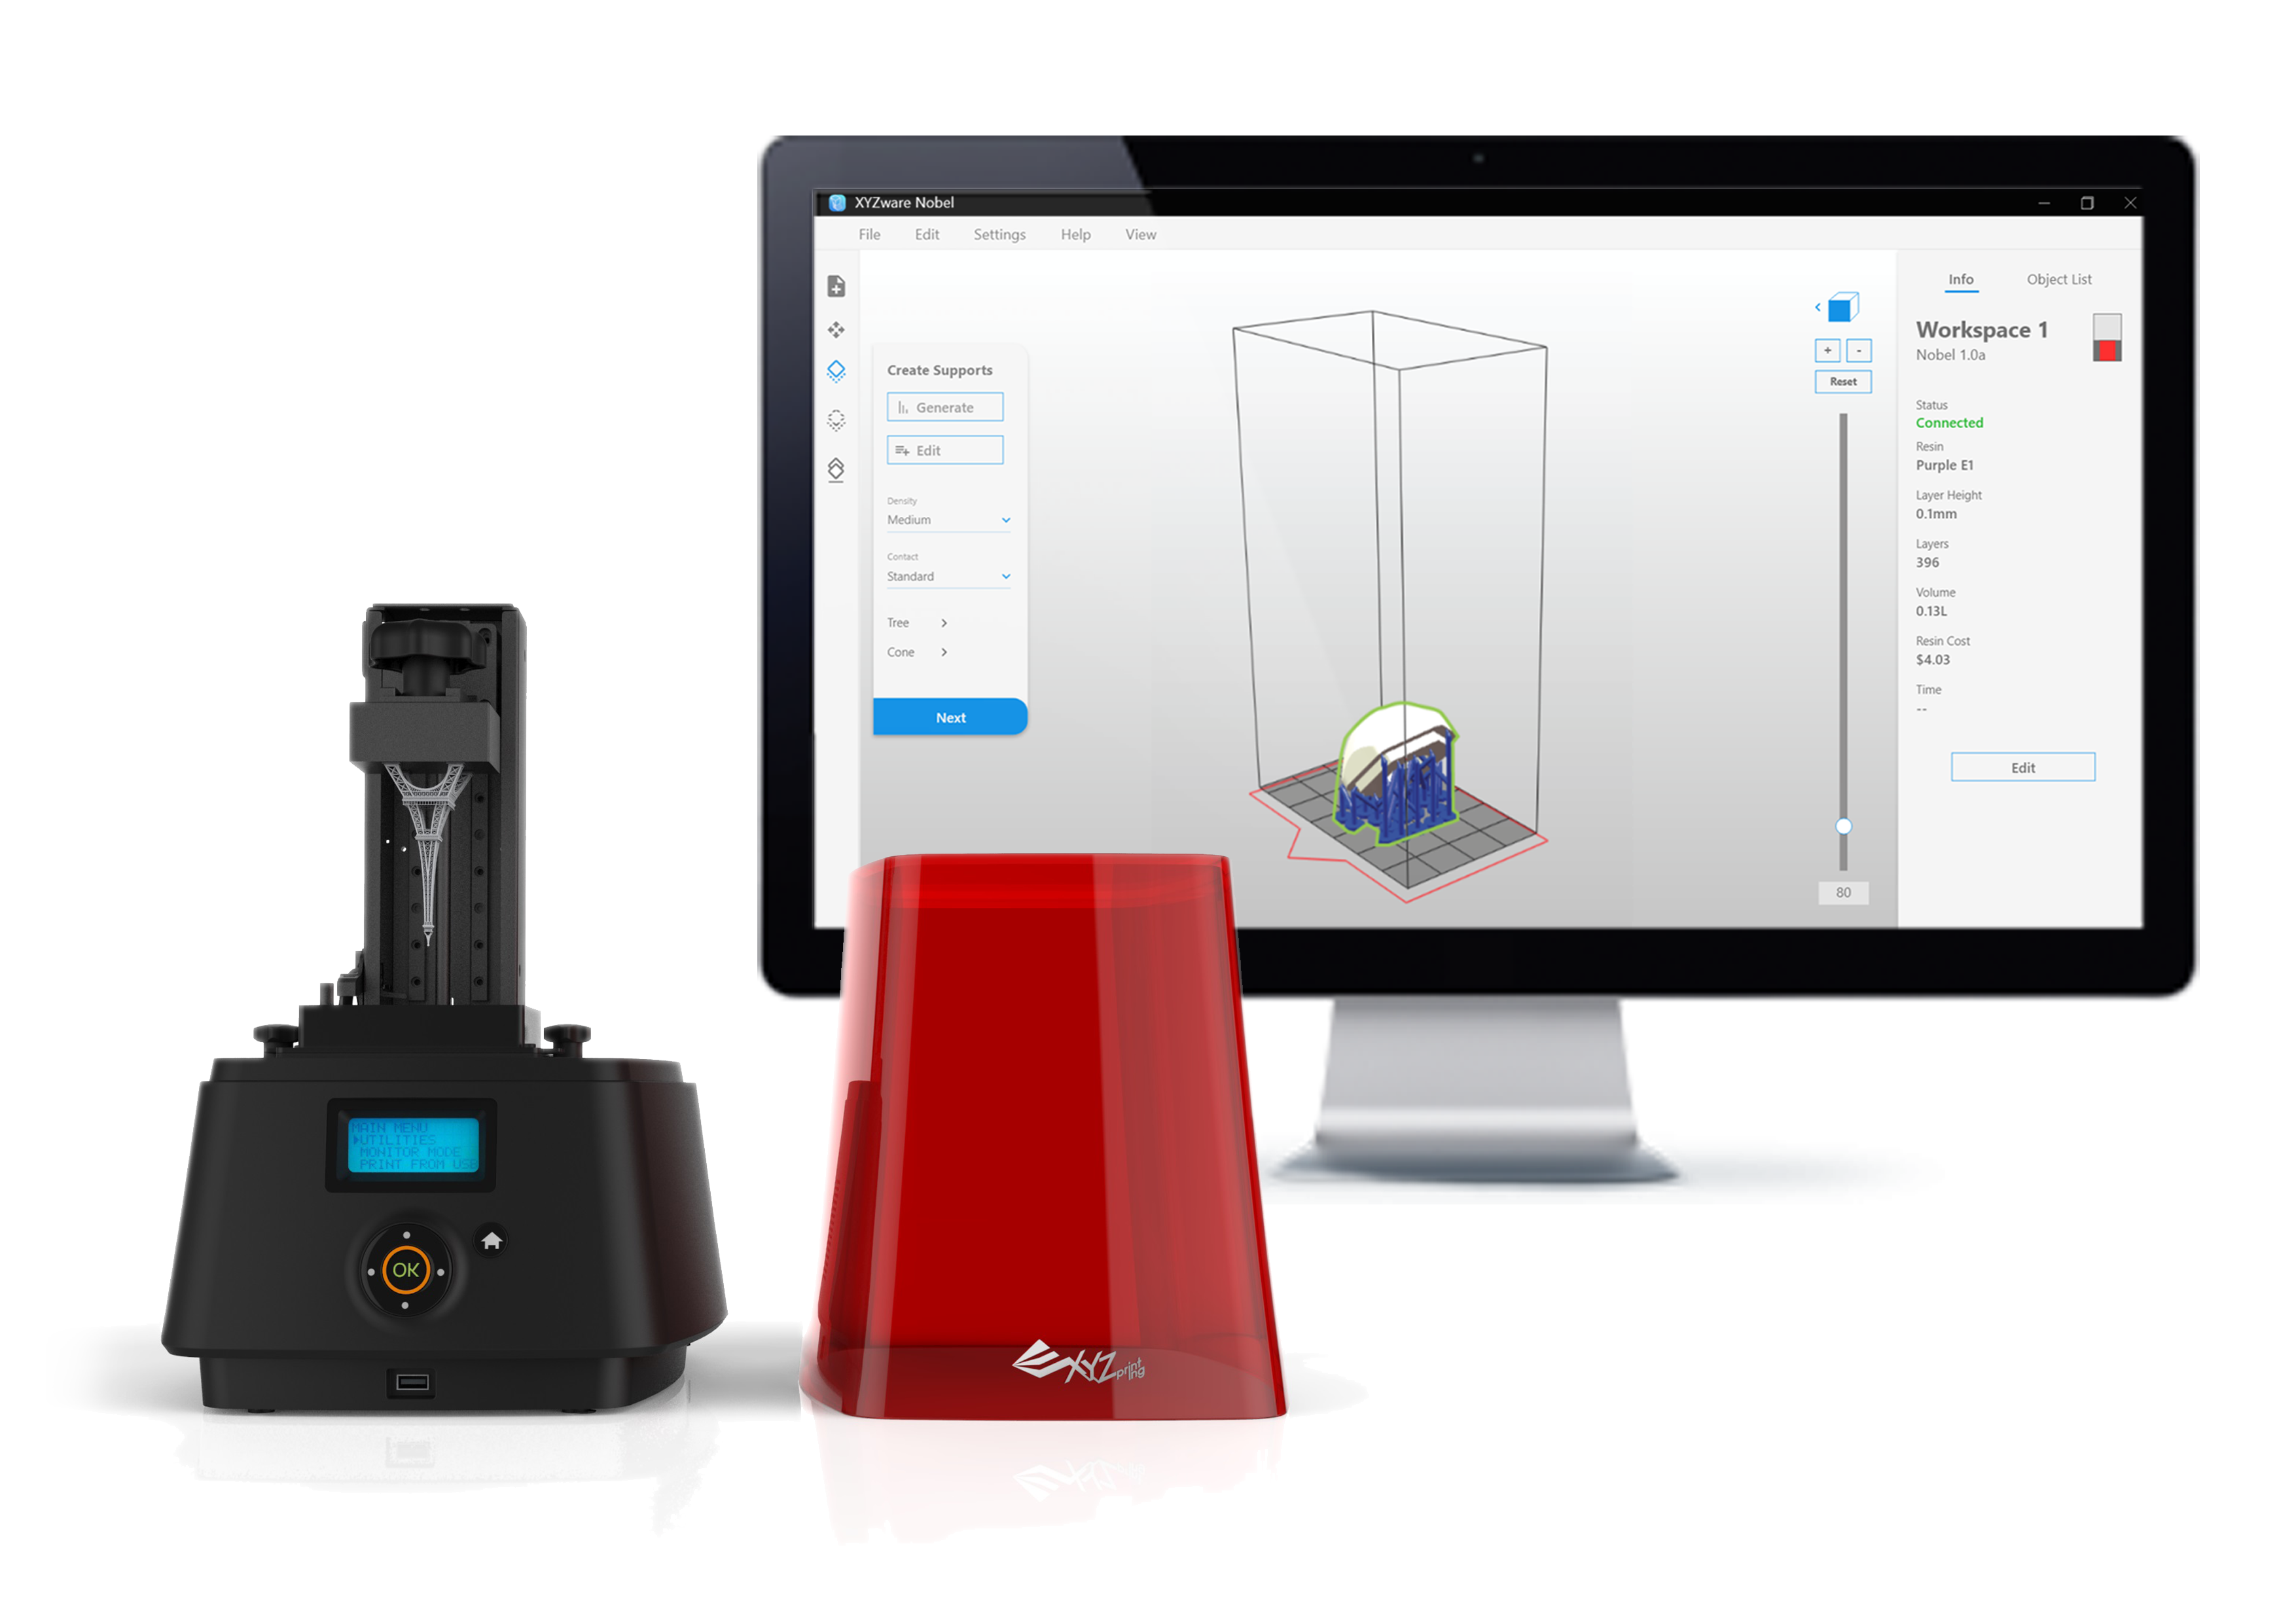
XYZware Nobel is a file preparation software for resin-based industrial-grade 3D printers. Resin-based 3D printing, also known as stereoliphography (STL) and digital light processing (DLP), uses light to harden resin one layer at a time to form a physical model.
In response to the growth of the industrial 3D printing market, XYZprinting realigned its business direction to develop printers for a range of industrial 3D printer applications. Designers, dentists, jewelers, plastic surgeons, and lean product development teams are increasingly using 3D printing in their everyday workflows and existing print preparation software needed to meet their expectations.
I was responsible for defining the problem, undertaking user research, user testing multiple paper prototype solutions, and producing a detailed UX software specification for the software team to follow. The final UI is slightly different to the images shown here. The images you see here were created by me.
Problem & Opportunity
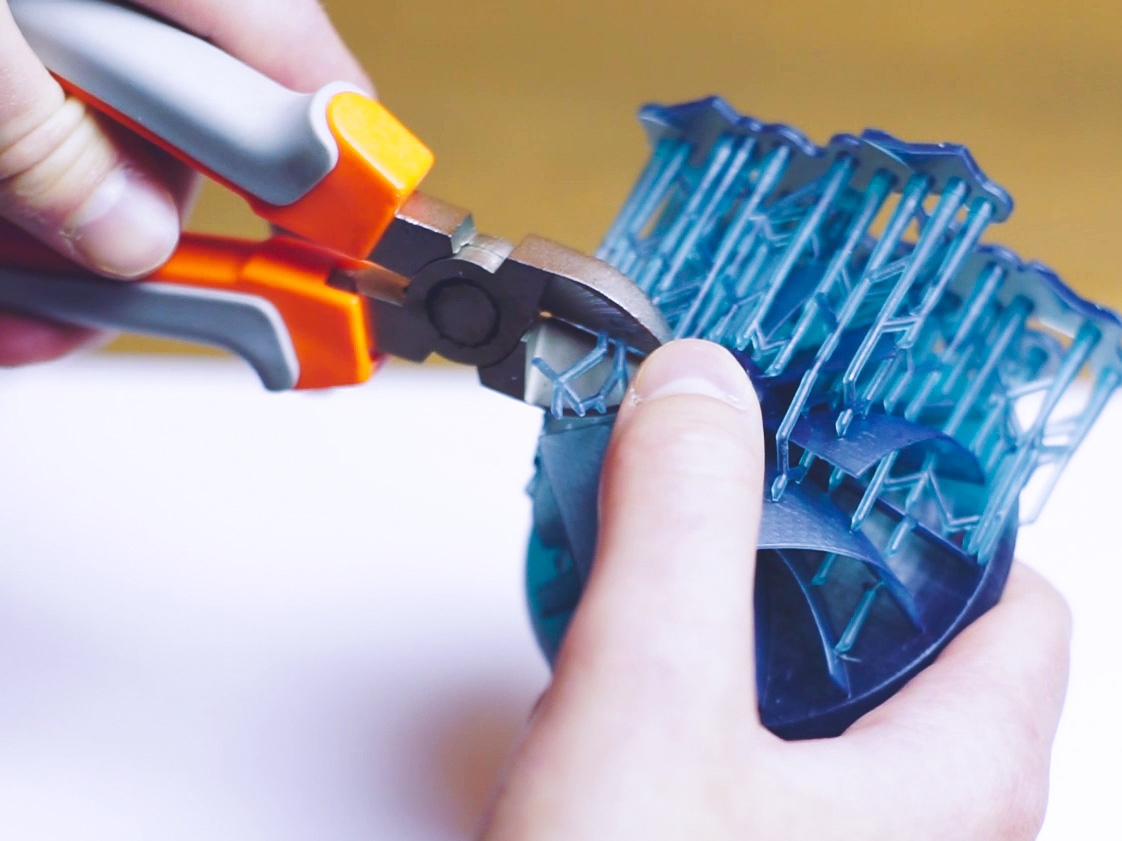
Amazon reviews and feedback from the customer support team highlighted that a lot of print jobs failed after several hours of printing because 3D models weren’t prepared in the software properly. If the part wasn’t rotated in the proper direction and the support material was added in the wrong areas the part would fail during printing. For the businesses who owned the printers this wasted machine time and materials and it was frustrating for users because they would have to redo everything. Interviewing users, we found that a lot of people, new to this method of 3D printing, learnt by trial and error and weren’t aware of the differences between DLP and SLA 3D printing or the best practices for preparing models. This helped explain why in 2018, 22% of product feedback had print failure as a keyword.
Solution
I created an interaction flow that semi-automated the model preparation process to minimize errors and displayed the material cost per part so users can easily create quotes for their customers. To track the print failure rate we added a print confirmation screen on all printers that allow users to feedback whether the print failed or not. This is not only valuable for us as a key metric but in future can be used by customers to calculate the ROI for their printers. I also collaborated with marketing to link to articles on our website explaining the printing process and commonly encountered issues.
DISCOVER PHASE
Understanding and insight into the problem
Based on over 50 Amazon product reviews for the printers that use XYZware Nobel, we found that a majority of the ratings were on opposite ends of the spectrum.
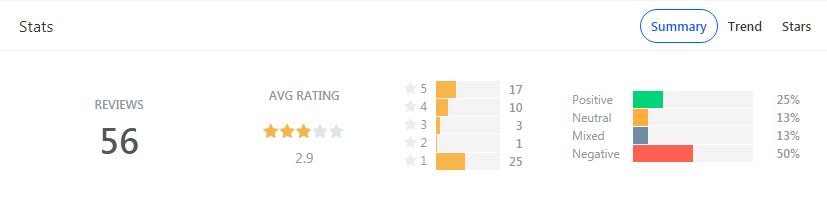
After reading through all the negative reviews one common theme was that generating support material was difficult, especially for new users.
“Being new to SLA the first few prints were a bit hit and miss. The main issue was the piece lifting off the bed during printing. However, I believe now that has more to do with how I was setting up the print.”
Project Kickoff
To define our design direction, we kicked off the project by holding an empathy map and user journey brainstorm session to work with all project stakeholders to find out the issues and gain an understanding of what the software had to do.
A key takeaway from the workshop was that the software needed to support a range of new business-grade 3D printers as well as the consumer-grade printers. This meant we had a wide range of different user personas who used the software for different reasons.

Further Research
I interviewed two users remotely and one in person. Two 3D printed models professionally for customers, and the other who had purchased a resin printer to learn about the technology and print board game figurines. I wanted to double check our assumptions from the workshop, learn more about their work environment and see what issues they were experiencing with the software.
I also interviewed customer service representatives from different service centers to find out what issues users commonly encounter when printing and what they do to address those. I found out that a majority of support tickets were created because users didn’t know how to get complicated models to stick to the print bed using support structures in the software.
The insights highlighted were:
- Users didn’t know the difference between DLP and SLA printing and print preparation best-practices.
- Generating support material in the software was overly complicated
- It was hard to arrange multiple models in the same print
- No easy way to calculate the cost of the part for quoting customers
- DLP and SLA printing is messy, so printers are often stored in workshops and files sent via Wi-Fi
DEFINE PHASE
Design Planning
We presented our research findings to the stakeholders, and decided to prioritize the following design objectives:
- Simplify file preparation
- Create a way for print failures to be counted
- Streamline preparation process
- Provide a way for customers to calculate the part cost
- Allow users to select and scale multiple models easily
- Enable remote printing to multiple printers
DEVELOP PHASE
Design
I would focus on the design on XYZware Nobel while my colleague would work on the design of the printers touch panel.
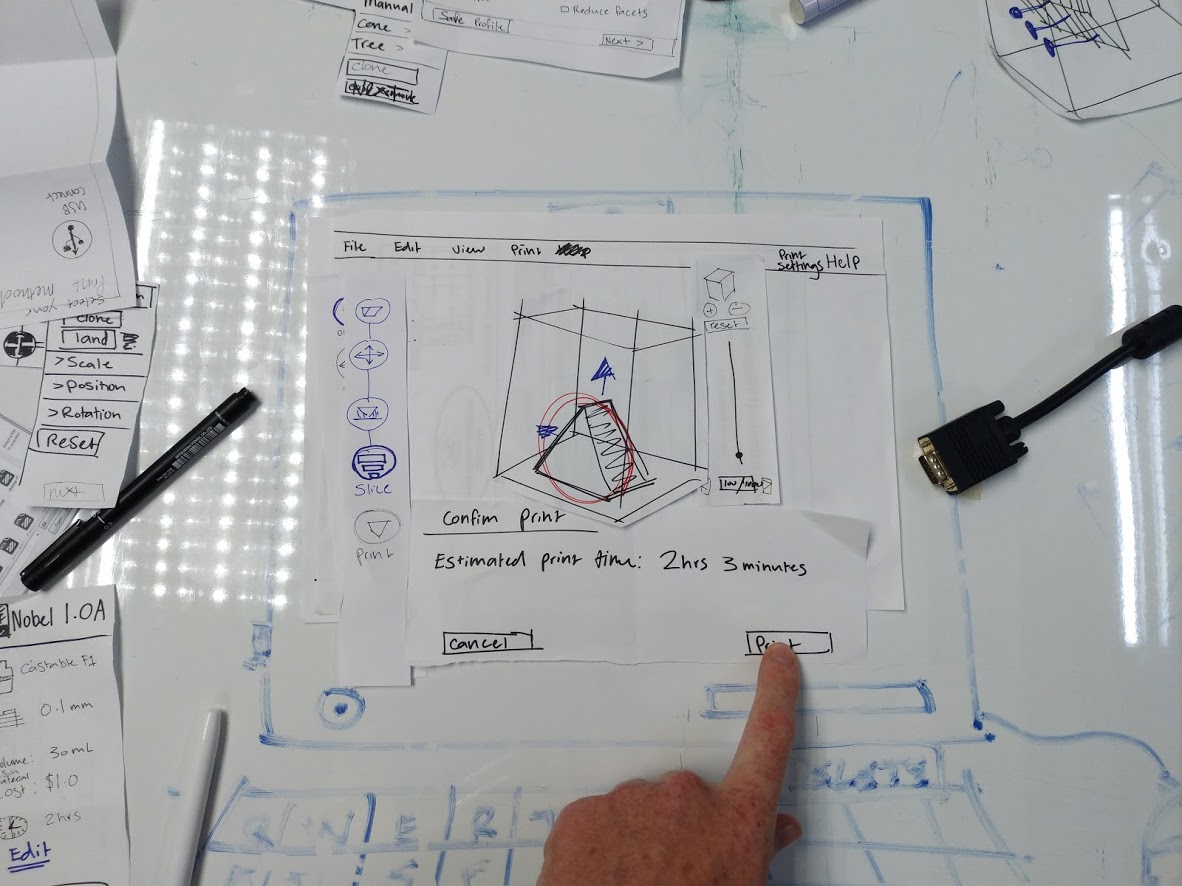
To address these objectives, I sketched a rough flow on paper and began generating a series of paper prototypes that tried to simplify the process in 5 easy steps. Automating the process where possible but at each stage giving advanced users the option manually adjust settings. I asked colleagues to act out tasks such as prepare a file for printing and change printers.
Initially, people unfamiliar with the printing technology mistook it for Fused Deposition Model printing software and couldn’t locate important settings in the process. Advanced users were more concerned about setting up multiple printers and how to manage them from one computer.
I wanted to add a print rating section in the software for users but we decided it would be best to add it to the touch-screen interface on the printers because users interact with the printer itself when removing models after printing not the software.
DELIVERY PHASE
Prototypes
I took this feedback and prepared several prototypes in Axure. I asked the users I interviewed earlier to run through more scenarios and comment on the design each time. The feedback helped me resolve a lot of usability issues such as first-time setup this saved time for the software team downstream in the process.
Things I Learnt
Before starting projects it is really important to understand the scope and feasibility. During the research phase I should have engaged with the development team to better understand their workload and what was doable in the timeframe. I got too excited by the possibility to improve this software and didn’t properly address the business concerns. As a result the software release was delayed. Since working on this project, I have addressed this issue by hosting co-design workshops with engineers to make sure we are all on the same page.
My Role
UX Designer
Tools: Axure, Figma, pen and paper
Date: June 2018 - January 2019 (6 months)
Team: Jessica Peng, Ring Yan
Deliverables: Axure design specification document, Axure interactive prototype, research findings presentation, XD interactive prototype.